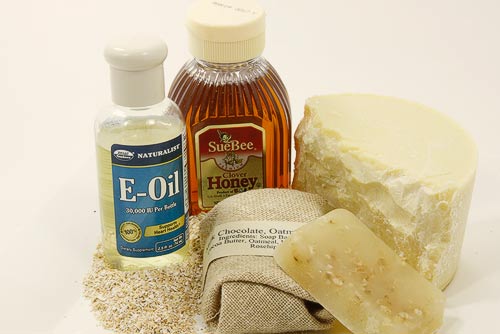
Milk Chocolate Oatmeal Honey Soap Recipe
Isn't making your own products so rewarding? I love it and if you're starting to make your own soaps, I hope you're liking too.
This bar of yummy milk chocolate oatmeal and honey soap I use at the kitchen sink but you can use it where ever you want. No drying, nice lather.
Again, this recipe uses Melt and Pour Soap Base and a few other ingredients you probably have on a shelf already.
Ingredients for Making Your Soap
- 1 pound Clear Soap Base, Honey Melt and Pour Soap Base or White Melt & Pour Soap Base
- 1/2 cup Whole Milk
- 1/4 cup Oatmeal (give this a few burst in the coffee grinder)
- 1 tablespoon Honey (the kind you use on toast)
- 1 tablespoon Beeswax
- 1 tablespoon Cocoa Butter
- 10 drops Vitamin E Oil
- 10 drops Rosehip Seed Oil
- 1 teaspoon Chocolate Fragrance Oil (you can add more or less depending on your liking)
Directions
- In a double boiler, melt the melt & pour base. When the melt and pour base is just about completely melted, add in the milk, beeswax, vitamin E, cocoa butter, honey, and the rosehip seed oil. When all these ingredients are melted completely, remove from heat.
- Add in the oatmeal and stir.
- Remove from pan. Note: prior to pouring in molds, if you let sit for 30 seconds and the oatmeal is sinking to the bottom or your bowl, continue stirring for a few minutes until the mix starts cooling and thickening. Then let sit again for 30 seconds, as the mix cools and thickens, it should allow the oatmeal to not sink to the bottom.
- Pour into your molds.
- Spritz with alcohol (rubbing alcohol) to remove any bubbles that appear after pouring in the molds.
Note: I turn the burner on a medium-low to medium heat and slowly melt my ingredients.
Let sit in the molds until hard, about 3 hours, then pop them out and enjoy your soap.
Gift Giving Ideas
If you are going to be giving these soaps as Christmas or Birthday gifts, you can cut 6 inch by 6 inch squares of material to wrap them and tie with twine. Another fun way to wrap the soap is wax paper, like you'd use for baking, place a sticker over the area where the edges come together.
Have you made this soap? If you did, what did you think of it?
Homemade Recipe Tips
- Make sure your work space and hands are clean.
- Make sure the containers you are using are clean.
- Make sure salves and creams have cooled enough before pouring in glass containers so they don't break.
- Keep the batch size small so the homemade products you use are fresh unless you're making gifts.
Infusing Herbal Oils
- Before you decide on which plant material you are going to use, I recommend you do your research on the plants or herbs you want to use.
- The infused oils I make are for topical use, I recommend you do a little test on your skin prior to using your infusion, just to make sure you don’t have a reaction, chances are pretty low that it would bother you, but you just never know especially if you have sensitive skin.
- All my infused oils have turned out great for the salves I’ve made or using them as they are or mixing with other oils and essential oils.


 Wellness Mama 5 Step Lifestyle Detox