Soothing Homemade Shower Vapor Melts
Recently I had a stuffy nose and was thinking to myself I'd take a steamy shower to help clear my head and nasal passage. Then I thought, I wonder how I can incorporate essential oils to help ease congestion. That, naturally, lead me to internet research.
What I found were a few recipes; each a little different. I decided to make a couple and modify them slightly, as I do, so I could compare the outcome.
You can buy shower steamers but if you like doing things yourself, you can quickly and easily make your own homemade melts with just a few ingredients.
I love these little gems and you don’t have to wait until you have a cold or the flu to use them. If you feel you need a pick me up in the morning you can pop one in the shower.
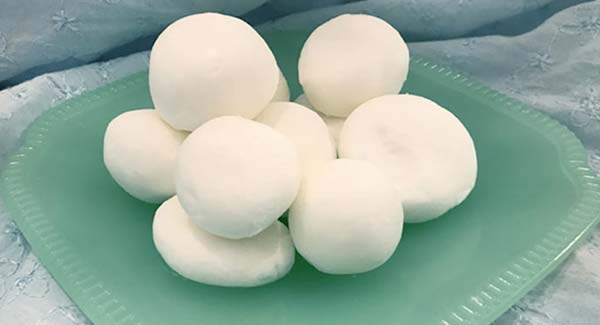
Shaping the Shower Melts
For either of the recipes below, you can use silicone molds that come in a variety of sizes and shapes but I wouldn't get anything too large. You can use a spoon to pack the mixture into the silicon molds. I do have these at home but I was in the process of cleaning out a couple of rooms and a hall closet and couldn’t find them so I used my hands for making balls and discs.
That’s the reason for this “Shaping the Shower Melt” section. To tell you if you don’t have molds and you use your hands, wear latex gloves! Or latex free gloves if you are allergic.
I learned my lesson on the first batch I made. My husband has gloves in the garage for working on cars but it didn’t cross my mind to wear them. When I was done shaping the melts and washing my hands there was still this strong vapor smell lingering and it made me nauseous.
I had to wash my hands really good to get rid of the smell – so wear the gloves and I tossed mine in the garbage in the garage.
FYI - Don't worry though, when you use them in the shower, they aren't strong smelling at all.
Shower Melts Using Essential Oils
Super easy to make and you probably have at least half the ingredients at home already.
- 1 cup Baking Soda
- 1/2 cup Epsom Salt
- 3 teaspoons water
- 25 drops Eucalyptus Essential Oil
- 25 drops Peppermint Essential Oil
- 25 drops Rosemary Essential Oil
You can also add about 1/2 the amount of Tea Tree Essential Oil if you’d like.
Directions
- Combine the baking soda and Epsom salt in a mixing bowl and mix until thoroughly combined. I used a fork.
- Add in the water and combine.
- Add in the essential oils and mix until thoroughly combined.
Now either press into the silicon molds or gently form into balls or discs with your hands. Put them in the freezer until hardened, about 2 to 4 hours. Or leave them on the counter for 24 to 48 hours until dry and hard.
I have read that you can use different essential oils and make a nice relaxing scent using Lavender, rose and other essential oils or even a citrusy essential oil for a nice pick me up but I haven't tried this yet, but I will.
How to Use the Shower Melts with Essential Oils
Place these on the shower floor near the end of the shower stream (yet off to the side and out of the way of stepping on it). Enjoy your shower.
Shower Melts Using a Vapor Rub
Another easy recipe but just a little different.
- 1 cup Cornstarch
- 3 Tablespoons Vapor Rub
- 3 teaspoons water
Directions
- Mix the vapor rub and cornstarch until thoroughly mixed. Again, I used a fork to mix the ingredients.
- Add water and mix to combine all ingredients.
Again, either place in silicon molds or gently form balls and discs by hand. Place in the freezer for 2 to 4 hours to overnight until hardened.
How to Use the Vapor Rub Melts in the Shower
Because of the vapor rub, these can cause the shower floor to be slippery. You can place one in a small bowl and again place indirectly from the stream of water and place it out of the way of stepping into it. You could also place it close to the drain.
I make either of these in various sizes but the largest I form is a little larger than a piece of Ferrero Rocher chocolate. Store in airtight container.
Vapor Rub vs Essential Oil Shower Melts
Despite the strong smell when making these I was surprised how mild they actually were in the shower. Perfect actually and for me, I liked the essential oil melts best. The vapor rub melts worked as good as the other but because it has the greasy/oily vapor rub in it, it left a slight film on the shower floor and if I didn't have a textured floor surface, I could see it causing slippage.
I did place the vapor rub melts by the drain but it wasn't getting a direct hit (so to say) from the water so I could really only notice it if I was facing towards the shower spray.
The other thing I noticed - we have a high ceiling/open master bathroom with a larger tub and shower area and I didn't get the nice effect of the melts in the shower - as I did in our other bathroom which is an average sized bathroom and shower area - but when I got out the master bath shower, the rest of the bathroom had a nice vapor scent.
You might want to make your own comparisons and see what you think.
IMPORTANT DISCLAIMER INFORMATION: None of the essential oil topics presented to you on Earth to Jamie have been evaluated or approved by the FDA. The recipes and opinions presented to you should not replace personal judgment nor medical treatment when indicated, nor are they intended to diagnose, treat, cure, or prevent any disease. Always talk to your physician about the use of alternative methods or any other complimentary treatment. Reading content on this website indicates your understanding and agreement to our disclaimer statement. See Terms of Use under About Us for more information.
Performing a Patch Test and a Few Safety Tips.
If you are new or not sure how a blend or essential oil may react on your skin, it is always recommended to do a patch test prior to use. To do this, mix 2 drops essential oil to about 1/2 teaspoon carrier oil then apply to a patch of skin such as the forearm. Observe that area over the next 1 to 2 hours for any noticeable reaction; this will usually occur within 5-10 minutes. If you experience any irritation or discomfort either stop using or adjust the amount of essential oils you've used.
If you have not used a carrier oil before, you can also perform a patch test to the inner arm area.
Prior to using essential oils, always check the label for appropriate usage and do not apply essential oil to sensitive areas like the eyes, ears, and mucous membranes. If you have a medical condition and/or you are taking medications, consult your physician prior to use.
More information about essential oils can be found here
Check out the Health & Beauty section for Homemade Beauty Recipes


 Wellness Mama 5 Step Lifestyle Detox